Step 1
The beer brewing process begins with the soul of beer: malt. It is the foundation for the entire multistep brewing process – the starting point for flavors, aromas and textures that emerge to create an almost unlimited selection of brewed excellence. An understanding of how to brew beer can only enhance your appreciation for that final product!
Brewers generally purchase malted barley from a variety of maltsters in the United States, Canada and Europe. Maltsters vary in size from multinational to regional microbrew maltsters. A brewer chooses a malt type – or more typically, multiple malt types – for the intended brew as the first part of the beer-making process.
Step 2
The malt is then milled to prepare it for mashing. A malt mill, commonly called a “grist mill” or “grain mill,” cracks open the husks of the malt kernels to expose the starches inside. Some brewers may opt to completely de-husk the malt during milling, for reduced bitterness and astringency and increased smoothness in the finished beer. At the end of this process, cracked and optionally de-husked, the malt grain is now called “grist.”
Step 3
The brewer transfers the grist to the first brewing vessel, the mash tun, and combines it with water (sometimes called “liquor”) using one of two methods: infusion or decoction. During this process, the natural malt enzymes break down the grist’s starches into simple sugars.
If the brewer takes the infusion route, he adds grist to water and applies steam to the mash tun to reach desired temperatures. (The grist mixture is called “mash.”) At times, the mash may rest at certain temperatures. Part of the brewer’s art is to choose the right temperatures and rest at those temperatures to get the desired results in body and alcohol for the beer.
The decoction mashing process – used historically and to this day by German and Czech brewers for brewing lagers, as well as by some American brewers – involves another vessel called a “mash kettle.” A portion of the mash is transferred from the mash tun to the mash kettle where it is boiled and then returned to the mash tun with the balance of the mash. Possibly repeated several times, boiling the mash adds body to the beer and can produce more desirable malty flavors, such as caramel and toffee. The malty mash may also caramelize in the kettle, ultimately adding to the beer’s color and flavor.
After this step, the completed mash is transferred to the lauter tun.
Step 4
“Lautern” is German for “to clarify,” so lautering is the process of separating the sweet, sugary liquid mixture, called “wort,” from the mash. The lauter tun has a screen-like bottom on which the grain husks and other mash solids settle and form a natural filter. This allows the wort to flow through via gravity and separate from the mash.
“Sparging” involves rinsing the bed of solids on the false bottom with heated water to extract as much of the fermentable and unfermentable sugars as possible into the wort. This is important, since sugars determine the beer’s original gravity and play a significant role in fermentation.
The remaining spent grains – the solids left after lautering – are generally transferred to farms to be used as nutritious cattle feed. Remember, no alcohol has been produced at this point in the brewing process. One more step remains before fermentation.
Step 5
Wort is transferred to the brew kettle where it is brought up to a vigorous, rolling boil and sterilized. Brewers then add hops to the kettle, generally in a minimum of three separate intervals during a 60- to 120-plus-minute boil period. Bittering hops are added at the beginning of the boil to extract the bitter alpha acids. Generally, the longer the boil, the more hop bitterness is extracted. Flavor and aroma hops are usually added during the final 10 to three minutes of the boil, respectively.
Any remaining enzyme activity in the wort halts during the boil, and the wort produces its full color and flavor from the very high temperature. Once the boil is complete, the boiled and hopped wort goes into either a whirlpool or “hop back” followed by a heat exchanger.
Step 6
The whirlpool phase occurs once the boil is complete. This settling step may take place in the brew kettle, but in large breweries it is generally in a separate vessel. The wort is further clarified when the brewer removes the “trub” (protein and hop solids, pronounced “troob”) from the wort after a solid trub cone has formed in the center as a result of the whirlpool and settling action.
In some breweries, a hop back may be used. The hop back employs a layer of fresh hop flowers in a sealed chamber. Hot wort from the brew kettle flows through the hop back, where the fresh hops filter out the trub and provide the additional benefit of adding more hop aroma compounds to the wort. A hop back is generally used when whole flower hops are used in the boil, while a whirlpool effectively captures smaller particles left by pelletized hops.
Once the trub has been removed, the wort passes through a heat exchanger where it is brought down to fermentation temperatures on its way to the fermentation tank. The cooling water in the heat exchanger captures the heat from the wort (the heat literally exchanges). For efficiency, many breweries then store this newly heated water to begin the next brewing cycle (step 3) or to use for other purposes.
Step 7
It’s now time for yeast – the life of beer – to perform its magic on the sugary and hopped wort. The wort is transferred to the fermentation tank where it is brought to the starting temperature, specific to the type of beer being produced. The yeast is then pitched into the tank, and fermentation – the conversion of sugars to alcohol and carbon dioxide – begins. This is the primary fermentation. Once it’s underway, the liquid can rightfully be called beer. Fermentation activity produces heat and increases the temperature of the wort. The brewer monitors and controls the temperature closely. Temperature has a direct impact on the aroma and flavor compounds, or esters, produced by the yeast, which shape the finished beer’s character. Warmer temperatures promote ester development.
Generally speaking, two major yeast types exist in the brewer’s tool kit: ale yeast, which is also referred to as “top fermenting” yeast, and lager yeast, which is “bottom fermenting” yeast. Ale yeast strains tend to do their fermentation work at warmer temperatures (59-69°) and rise to the top of the wort, often producing esters resulting in a fruitier, sweet beer. Lager yeast strains generally ferment at cooler temperatures (45-60°) and process more sugars, resulting in a well-attenuated, clean (low to no esters) and dry beer.
The beer that has finished primary fermentation is called “green beer” or “young beer,” as it needs to be matured or aged for one to several weeks prior to packaging.
Step 8
“Kräusen” refers to a traditional German lager brewing process in which actively fermenting wort from a new batch of beer is added to a finished green beer to cause a secondary fermentation. Kräusening is an additional, optional step that can take place in the fermentation tank, the storage/conditioning tank or a separate tank.
During the cold-conditioning step after primary fermentation—also called lagering (“lagern” means “to store” in German)—the yeast becomes dormant. Kräusening infuses active yeast to increase the natural carbonation of the beer. Additional benefits include balancing the beer’s flavors as the yeast removes undesirable byproducts of the primary fermentation, including diacetyl, acetaldehyde and other volatile compounds. Kräusening can also add body and smoothness to the beer.
Step 9
The storage or conditioning phase period varies, depending on the type and style of the beer. It can range from one to six weeks or longer. This process allows the beer to mellow and mature, with all of the flavors fully developing and melding together to create the beer that ends up in your glass.
The brewer may elect to add dry hops or fresh wet hops to the beer during this step to capture more hop aroma and flavor character. Wooden barrel aging is an additional step the brewer may take after the conditioning period to add unique wood and spirit aromas and flavors to the beer’s character.
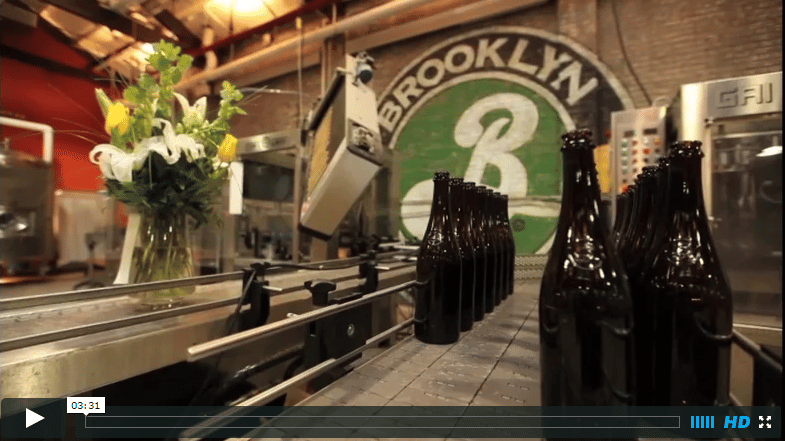
When conditioning is complete, the beer may be filtered to remove any remaining yeast and other matter, such as protein, to create a clear “bright” beer. This beer may then be stored in what’s called a “bright beer” tank. Some styles are meant to be unfiltered, such as many wheat beers, and some brewers leave all of their beers unfiltered. In other cases, brewers may pasteurize their beer prior to packaging.
While just a snapshot of the process behind the taste and aroma of your favorite beer, these nine steps illustrate the care and handling that goes into each glass of your favorite brew.
After the brewing process, however, the remaining effort belongs to you. So pick up your favorite brew – or experiment with a new one – and raise a glass to the process and the individuals behind the character of your beer.
Step 1
The beer brewing process begins with the soul of beer: malt. It is the foundation for the entire multistep brewing process – the starting point for flavors, aromas and textures that emerge to create an almost unlimited selection of brewed excellence. An understanding of how to brew beer can only enhance your appreciation for that final product!
Brewers generally purchase malted barley from a variety of maltsters in the United States, Canada and Europe. Maltsters vary in size from multinational to regional microbrew maltsters. A brewer chooses a malt type – or more typically, multiple malt types – for the intended brew as the first part of the beer-making process.
Step 2
The malt is then milled to prepare it for mashing. A malt mill, commonly called a “grist mill” or “grain mill,” cracks open the husks of the malt kernels to expose the starches inside. Some brewers may opt to completely de-husk the malt during milling, for reduced bitterness and astringency and increased smoothness in the finished beer. At the end of this process, cracked and optionally de-husked, the malt grain is now called “grist.”
Step 3
The brewer transfers the grist to the first brewing vessel, the mash tun, and combines it with water (sometimes called “liquor”) using one of two methods: infusion or decoction. During this process, the natural malt enzymes break down the grist’s starches into simple sugars.
If the brewer takes the infusion route, he adds grist to water and applies steam to the mash tun to reach desired temperatures. (The grist mixture is called “mash.”) At times, the mash may rest at certain temperatures. Part of the brewer’s art is to choose the right temperatures and rest at those temperatures to get the desired results in body and alcohol for the beer.
The decoction mashing process – used historically and to this day by German and Czech brewers for brewing lagers, as well as by some American brewers – involves another vessel called a “mash kettle.” A portion of the mash is transferred from the mash tun to the mash kettle where it is boiled and then returned to the mash tun with the balance of the mash. Possibly repeated several times, boiling the mash adds body to the beer and can produce more desirable malty flavors, such as caramel and toffee. The malty mash may also caramelize in the kettle, ultimately adding to the beer’s color and flavor.
After this step, the completed mash is transferred to the lauter tun.
Step 4
“Lautern” is German for “to clarify,” so lautering is the process of separating the sweet, sugary liquid mixture, called “wort,” from the mash. The lauter tun has a screen-like bottom on which the grain husks and other mash solids settle and form a natural filter. This allows the wort to flow through via gravity and separate from the mash.
“Sparging” involves rinsing the bed of solids on the false bottom with heated water to extract as much of the fermentable and unfermentable sugars as possible into the wort. This is important, since sugars determine the beer’s original gravity and play a significant role in fermentation.
The remaining spent grains – the solids left after lautering – are generally transferred to farms to be used as nutritious cattle feed. Remember, no alcohol has been produced at this point in the brewing process. One more step remains before fermentation.
Step 5
Wort is transferred to the brew kettle where it is brought up to a vigorous, rolling boil and sterilized. Brewers then add hops to the kettle, generally in a minimum of three separate intervals during a 60- to 120-plus-minute boil period. Bittering hops are added at the beginning of the boil to extract the bitter alpha acids. Generally, the longer the boil, the more hop bitterness is extracted. Flavor and aroma hops are usually added during the final 10 to three minutes of the boil, respectively.
Any remaining enzyme activity in the wort halts during the boil, and the wort produces its full color and flavor from the very high temperature. Once the boil is complete, the boiled and hopped wort goes into either a whirlpool or “hop back” followed by a heat exchanger.
Step 6
The whirlpool phase occurs once the boil is complete. This settling step may take place in the brew kettle, but in large breweries it is generally in a separate vessel. The wort is further clarified when the brewer removes the “trub” (protein and hop solids, pronounced “troob”) from the wort after a solid trub cone has formed in the center as a result of the whirlpool and settling action.
In some breweries, a hop back may be used. The hop back employs a layer of fresh hop flowers in a sealed chamber. Hot wort from the brew kettle flows through the hop back, where the fresh hops filter out the trub and provide the additional benefit of adding more hop aroma compounds to the wort. A hop back is generally used when whole flower hops are used in the boil, while a whirlpool effectively captures smaller particles left by pelletized hops.
Once the trub has been removed, the wort passes through a heat exchanger where it is brought down to fermentation temperatures on its way to the fermentation tank. The cooling water in the heat exchanger captures the heat from the wort (the heat literally exchanges). For efficiency, many breweries then store this newly heated water to begin the next brewing cycle (step 3) or to use for other purposes.
Step 7
It’s now time for yeast – the life of beer – to perform its magic on the sugary and hopped wort. The wort is transferred to the fermentation tank where it is brought to the starting temperature, specific to the type of beer being produced. The yeast is then pitched into the tank, and fermentation – the conversion of sugars to alcohol and carbon dioxide – begins. This is the primary fermentation. Once it’s underway, the liquid can rightfully be called beer. Fermentation activity produces heat and increases the temperature of the wort. The brewer monitors and controls the temperature closely. Temperature has a direct impact on the aroma and flavor compounds, or esters, produced by the yeast, which shape the finished beer’s character. Warmer temperatures promote ester development.
Generally speaking, two major yeast types exist in the brewer’s tool kit: ale yeast, which is also referred to as “top fermenting” yeast, and lager yeast, which is “bottom fermenting” yeast. Ale yeast strains tend to do their fermentation work at warmer temperatures (59-69°) and rise to the top of the wort, often producing esters resulting in a fruitier, sweet beer. Lager yeast strains generally ferment at cooler temperatures (45-60°) and process more sugars, resulting in a well-attenuated, clean (low to no esters) and dry beer.
The beer that has finished primary fermentation is called “green beer” or “young beer,” as it needs to be matured or aged for one to several weeks prior to packaging.
Step 8
“Kräusen” refers to a traditional German lager brewing process in which actively fermenting wort from a new batch of beer is added to a finished green beer to cause a secondary fermentation. Kräusening is an additional, optional step that can take place in the fermentation tank, the storage/conditioning tank or a separate tank.
During the cold-conditioning step after primary fermentation—also called lagering (“lagern” means “to store” in German)—the yeast becomes dormant. Kräusening infuses active yeast to increase the natural carbonation of the beer. Additional benefits include balancing the beer’s flavors as the yeast removes undesirable byproducts of the primary fermentation, including diacetyl, acetaldehyde and other volatile compounds. Kräusening can also add body and smoothness to the beer.
Step 9
The storage or conditioning phase period varies, depending on the type and style of the beer. It can range from one to six weeks or longer. This process allows the beer to mellow and mature, with all of the flavors fully developing and melding together to create the beer that ends up in your glass.
The brewer may elect to add dry hops or fresh wet hops to the beer during this step to capture more hop aroma and flavor character. Wooden barrel aging is an additional step the brewer may take after the conditioning period to add unique wood and spirit aromas and flavors to the beer’s character.
When conditioning is complete, the beer may be filtered to remove any remaining yeast and other matter, such as protein, to create a clear “bright” beer. This beer may then be stored in what’s called a “bright beer” tank. Some styles are meant to be unfiltered, such as many wheat beers, and some brewers leave all of their beers unfiltered. In other cases, brewers may pasteurize their beer prior to packaging.
While just a snapshot of the process behind the taste and aroma of your favorite beer, these nine steps illustrate the care and handling that goes into each glass of your favorite brew.
After the brewing process, however, the remaining effort belongs to you. So pick up your favorite brew – or experiment with a new one – and raise a glass to the process and the individuals behind the character of your beer.